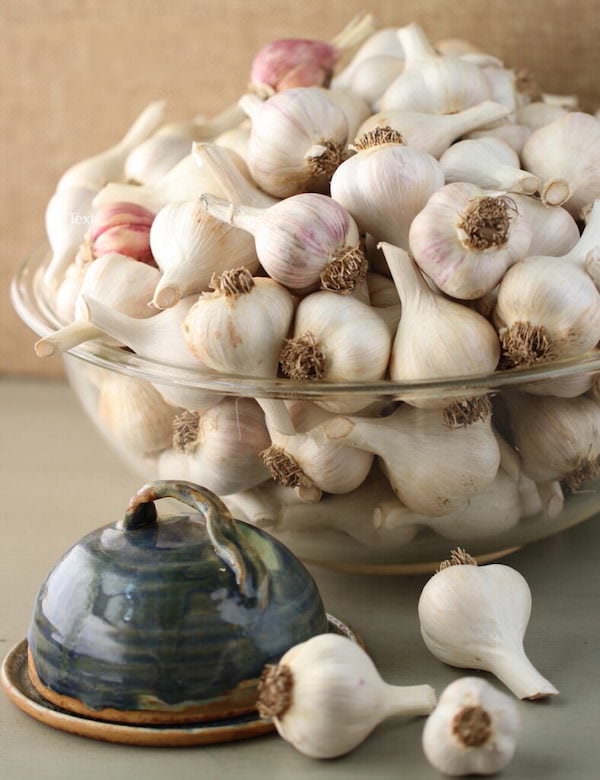
Garlic planting day is one of my favorite days of the year; I love our homegrown (hardneck) garlic THAT much!! It’s juicer with more flavor, and is sweeter with less bite, when compared to store bought. While my husband Jamie planted our crop today, I captured a video of the process (see below). Between the video and text, this post completely explains Jamie’s 5-step process for planting garlic in the fall.
My motto is you can never have too much garlic! If a recipe calls for this ingredient, I always go heavy handed and add 4 or 5 fat cloves to the pan. No one has ever complained that we smell pungent, which is very surprising 🙂
Garlic’s unique flavor profile is warm, spicy, earthy, and – when cooked – sweet. In addition, it has many health benefits.
Substantial studies have shown that garlic and its bioactive constituents exhibit antioxidant, anti-inflammatory, antibacterial, antifungal, immunomodulatory, cardiovascular protective, anticancer, hepatoprotective, digestive system protective, anti-diabetic, anti-obesity, neuroprotective, and renal protective properties.
Shang A, Cao SY, Xu XY, Gan RY, Tang GY, Corke H, Mavumengwana V, Li HB. Bioactive Compounds and Biological Functions of Garlic (Allium sativum L.). Foods. 2019 Jul
Growing Organic Garlic
Growing garlic isn’t that difficult and doesn’t take up much space. Pests generally don’t bother this crop, so it’s easy to grow organically. I must warn you though, if you do chose to start growing your own, you’ll never want to go back to store bought.
Hardneck vs Softneck Varieties
We’ve had success growing both hardneck and softneck varieties in our planting hardiness zone 6a. However, we prefer hardneck varieties for the following reasons.
Hardneck Varieties
- hardier for growing in cold weather zones
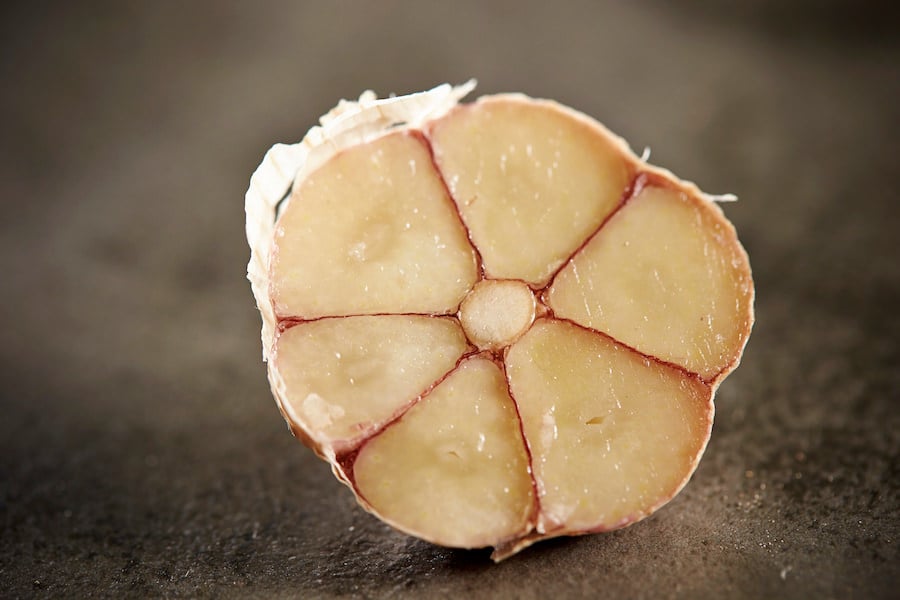
- grows a single row of large cloves, which are easier to peel and dice
- hardneck garlic has more flavor with less bite
- they shoot an early crop of garlic scapes (see bottom of post)
Softneck varieties are supposed to keep longer than hardneck varieties; however, we are always satisfied with how long our hardneck garlic keeps. We harvest a large crop each summer and find that it keeps well in our crawl space until the following spring. By the end of May/beginning of June we’re harvesting the garlic scapes – and then the next full crop is ready again around the 4th of July. We really only run out and need to buy garlic at the market for just a couple of months each year.
Where to Buy Garlic for Planting
We buy our starter bulbs from a fellow in the area or from growers at our local garlic festival. If you don’t have a farmer or garlic festival in your locale you can order them online, but it’s generally more expensive to buy online. Look for garlic that was grown in your area or at least in your particular planting zone so it’s already acclimated to your weather.
If you grow enough garlic and store it properly, you may have enough to plant for the following year. We never end up with any leftover to plant the following season because we eat it all 🙂
You can also grow the regular organic garlic that you get at the health food store or market, but you probably won’t find much variety and what they sell may not be right for your particular planting zone. Conventionally grown garlic is treated so that it won’t sprout, so if you’re going to plant store bought garlic make sure that it’s organic.
When to Plant Garlic
Mother Earth News offers this sage advice, “In fall, plant cloves in well-drained beds after the first frost has passed and the soil is cool. Cloves can also be planted in late winter as soon as the soil thaws, but fall-planted garlic produces bigger, better bulbs.” If you aren’t sure, you can refer to your hardiness zone to see when the first frost usually occurs. In our zone 6a we typically plant in mid-October; this year we planted a bit later.
5-Step Process for Planting Garlic in the Fall
Below is Jamie’s easy 5-step process, and he has never had a crop failure or problem. He plants about 300 cloves within 9 rows; each row is 15 to 20 feet long. This process takes him roughly 4 hours.
Bulb refers to the whole head of garlic
Clove refers to the individual “toe”
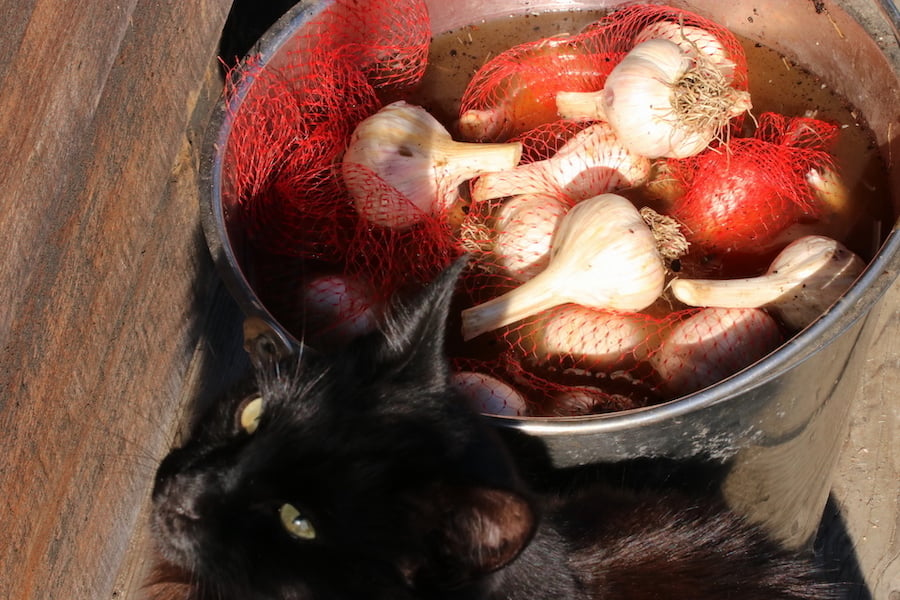
1. Soak the Bulbs
Jamie soaks the bulbs in a homemade smelly concoction for about a half-hour right before planting. This step is desirable, but optional. If you choose to soak the bulbs, mix together the following ingredients. This mixture will also be used for watering the bulbs after they are planted.
- 2 gallons of water
- 2+ capfuls of fish emulsion (adds nitrogen)
- 2 tablespoons of baking soda (sterilizes the cloves)
Liquid kelp can be substituted for fish emulsion. Whether buying fish emulsion or liquid kelp, look for all natural, no chemical formulas. Jamie usually buys these products from Garden’s Alive.
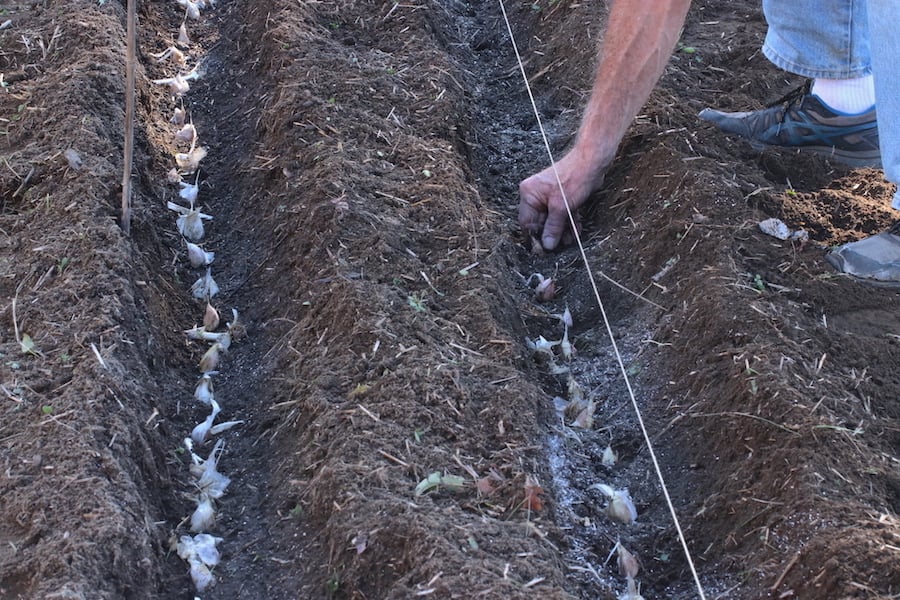
2. Prepare the Rows
Jamie shallow tills the area where he’ll be planting, but if you don’t want to use a tiller you can turn the soil over by hand. Jamie always uses a line strung around two posts to create straight rows. He also marks his rows with sticks or posts and labels them so he knows exactly what was planted.
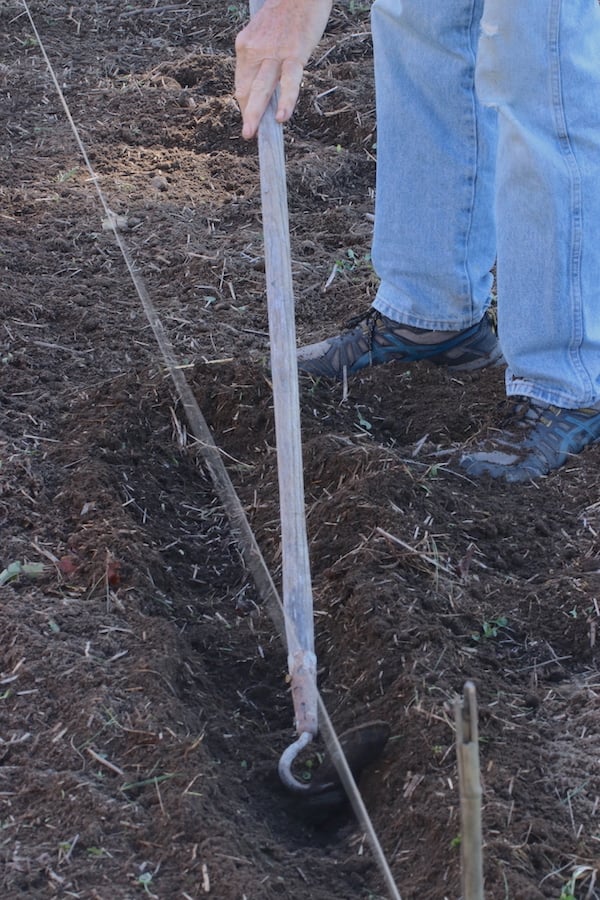
Use a spade to make the troughs 4″ deep
Space the rows about 12″ – 18″ apart
After each row is dug, Jamie sprinkles ground up organic eggshells into the trough to add calcium. Next he sprinkles organic bone meal into the trough to add phosphorous (and calcium).
Soil Composition Pointers
Soil composition is a blog post in and of itself, but here are a few pointers.
- Make sure the soil drains well, otherwise the roots may rot. The slope of the land and soil composition are factors that effect drainage.
- To successfully grow nutritious food – the soil needs to be fertile and healthy. If you doubt the health of your soil, read up on the topic and make the appropriate amendments. You may even want to have it tested; local university extension services may be able to help you in this regard.
- Jamie supplements his soil with our own kitchen compost, and sometimes with Coast of Maine organic plant foods. He sometimes adds our neighbor’s aged cow manure or aged chicken manure – and some years he adds chopped up autumn leaves. To chop leaves, drive over them with your lawn mower before raking them up.
3. Plant the Garlic Cloves
Push each clove into the soil so that they are 4″ deep with the pointy end facing up (Jamie separates the cloves for planting as he goes along).
Plant the cloves about 6″ apart
Each clove will grow into a new head of garlic
4. Water the Rows
Before covering the row with soil, water the planted garlic with the same liquid used to soak the cloves. If necessary, prepare more of this fish emulsion mixture.
5. Cover the Rows
Use the back of a rake to cover the rows with soil. It’s a good idea to spread a thick layer of straw over the whole area so the garlic cloves are insulated during cold winter temperatures. The layer of hay also discourages weeds in the spring, helps to keep the ground moist while the plants are growing, and after it rots it adds brown matter to the soil.


So now you know all about planting garlic in the fall!
Here’s a video of the process.

Read on to learn about harvesting, curing, and more
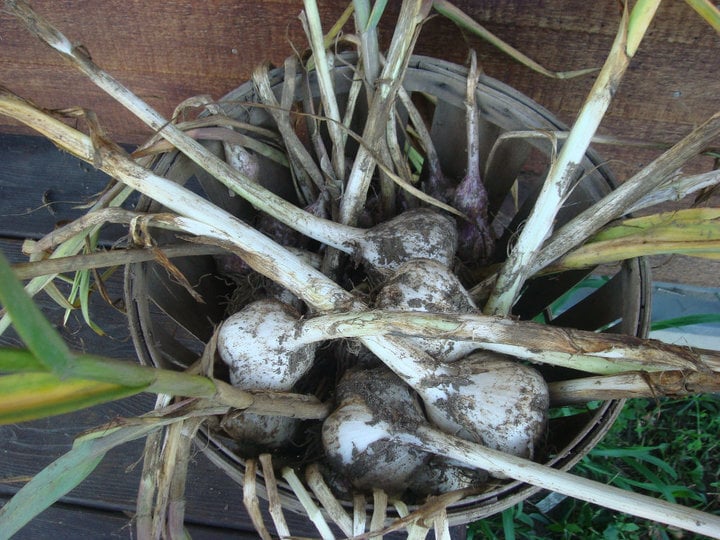
Harvest the garlic after the stalks have begun to wither and dry. At that point the bulbs are done growing. Gently dig up the bulbs; leave the stems and roots intact. Harvested garlic needs to be cured.
Curing garlic takes 3 to 4 weeks. During this process, the energy from the stalks becomes stored in the bulbs. The garlic keeps better and also tastes better when cured. I list a few different methods below. No matter which method you choose, the garlic needs to be stored in a dry, dark, well ventilated location during this process.
* Put the harvested garlic in a 1/4 or 1/2 bushel basket (bulb-side down)
* Tie bundles of garlic together and hang them (bulb-side down)
* Lay them single layer on a raised screen
After curing – cut off the tops, trim the roots, and put the garlic bulbs into a basket. Store in a cool, dry, dark, well ventilated location. We use our crawl space as a makeshift root cellar; even though it isn’t temperature controlled it is cool, dry, dark, and well ventilated.
Elephant garlic is actually a leek! It looks like garlic and has a similar, although milder, flavor.
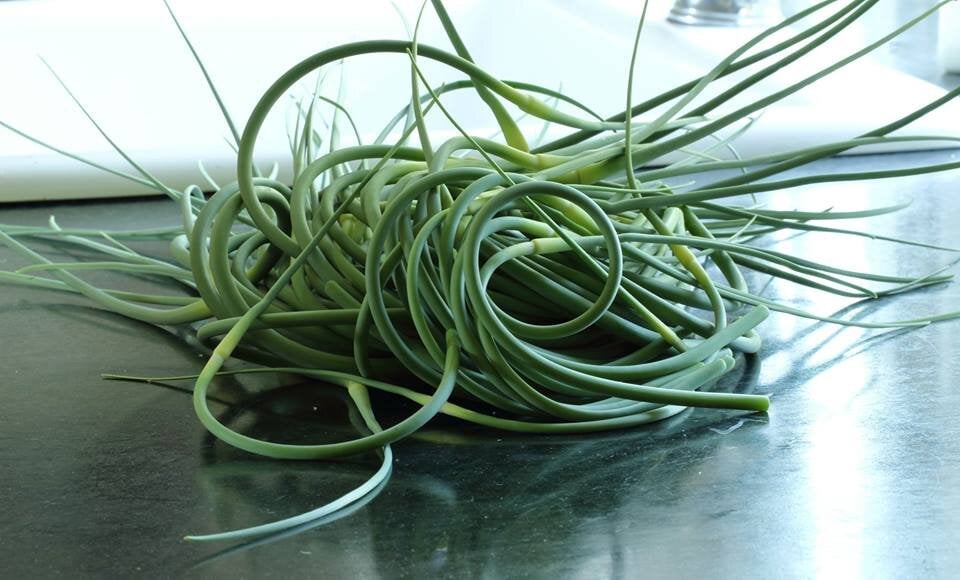
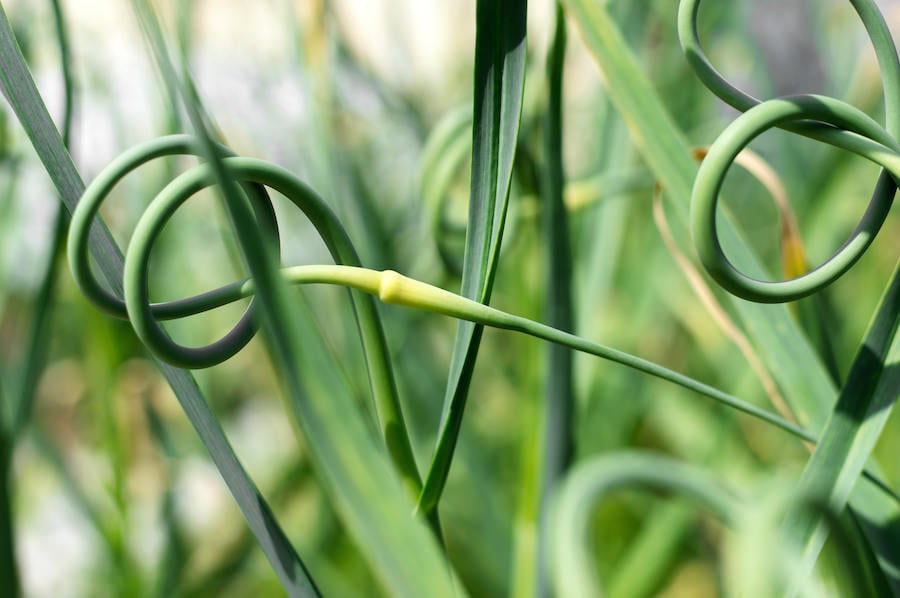
In early June the hardneck varieties of garlic will send up stalks from the center of the plant; these are called garlic scapes. They are thicker than the leaves. The scape, if left on the plant, will form a flower and then seed. We cut off the scapes so that the plant gets the signal to send all of its energy to the bulb, instead of putting energy into growing flowers and seed. Scapes are a culinary delight and can be used for making my Vegan Garlic Scape Pesto and Oil-Free Vegan Pesto; they are also delicious grilled, added to soups, stir fries, and more. I wrote another blog post with video that thoroughly explains What to do with Garlic Scapes.
If you enjoyed this post, you may also like another one that I wrote, “What to do with Garlic Scapes“. Feel free to leave a comment or question below.
Good content TY!
Glad to be of help!
I just loved this lesson on growing garlic, I’m anxious for fall to plant my first crop
I’m so glad you’ll be planting garlic this fall 🙂 Let us know how it goes!