Whether you want to roast just a few peppers to be eaten as a side dish – or have a bounty of peppers to preserve – look no further. This blog post with video thoroughly describes how to grill peppers, and also how to freeze them. Roasting peppers on the grill is by far the easiest and fastest method, especially if you have a peck (quarter-bushel) or more to preserve.
Each summer my husband Jamie plants multiple pepper varieties. They are typically prolific producers and I’m tasked with preserving the bounty for the off-season. For instance, he grows pimento peppers for making pepper relish, Karlo peppers for making paprika, jalapenos for making salsa, and Carmen peppers for roasting.
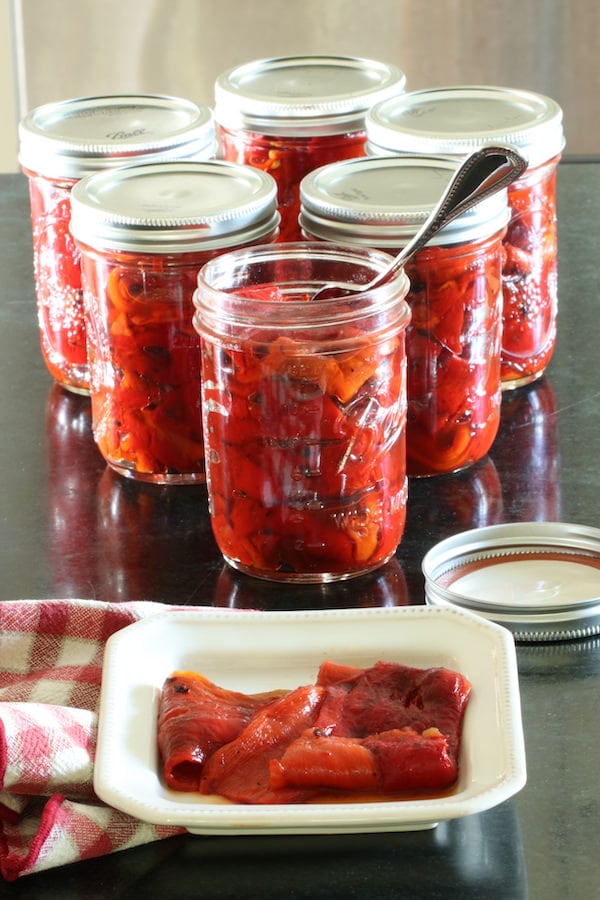
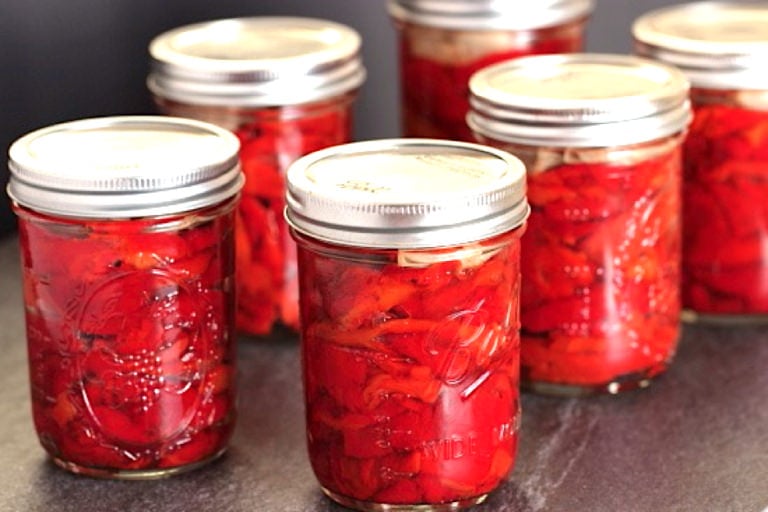
Our Carmen pepper crop was especially bountiful this summer providing us with over two bushels. So far we’ve roasted and jarred 10 pints, and we have about ten more to go. You could say I’m pretty proficient at putting up plentiful pecks of peppers. 🙂
This “how to grill peppers” exposé covers the following topics:
- Pepper varieties for roasting
- How to roast on the grill
- Steaming the roasted peppers
- Removing the pepper skins, stems, and seeds
- How to freeze roasted peppers using two methods
Pepper varieties
Look for varieties with thicker skins; it is harder to peel thin skinned peppers. For this purpose Jamie grows a traditional horn-shaped Italian pepper variety called Carmen. This variety always produces well for us; this summer was very dry and they still performed very well. Carmen peppers are large, sweet, good for roasting, and easy to peel.
Other varieties suitable for roasting include Karlo (sweet), and Caballero Ancho (medium hot), and Corno di Toro (sweet and spicy). Bell peppers also make suitable roasting peppers as long as they’ve been left on the vine long enough for the skins to thicken.
Use fully ripened peppers
If growing your own, leave the peppers on the plant until they fully mature. Putting up the peppers is one of the last projects I work on each summer. They happily hang on the plants, becoming prettier and sweeter (or hotter) until I have time to process them.
Green peppers, even green bells and jalapeños, are not fully ripened. Leave them on the plant until they turn red (or orange, yellow, white, chocolate, or purple depending on the variety). When mature, peppers contain more nutrients such as vitamin C, beta-carotene, and the anti-oxidants capsaicin, lycopene, lutein, and zeaxanthin; they’re also easier to digest. Depending on the type of pepper, they become either sweeter or hotter the longer they are allowed to ripen. And as previously mentioned, the skins thicken up when left on the vine to fully mature, which is desirable for roasting.
Step 1 – Grilling
- Wash the whole peppers; don’t cut off the stems
- Preheat gas grill on the highest setting, then turn it down to medium
- Arrange the peppers on the grill
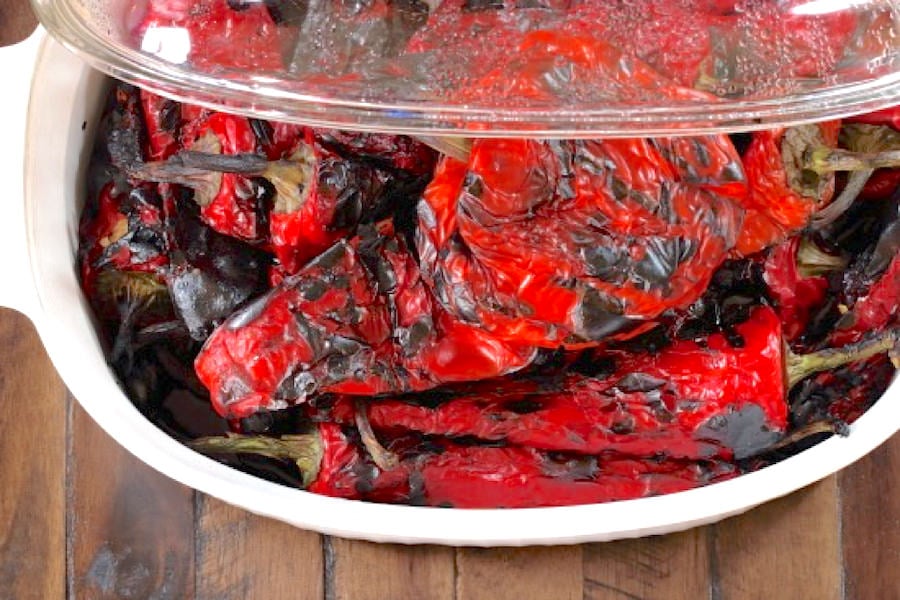
- Roast for about five minutes with the lid closed
- Using tongs, turn the peppers over and cook for about five more minutes with the lid closed
- Open lid and turn with tongs so all sides become charred
- The peppers are done when they begin to collapse and are evenly charred
Carcinogens when grilling peppers and other vegetables
You may have heard that cooking meat on a grill can create cancer causing heterocyclic amines (HCAs). Rest assured that grilling vegetables does not create these HCAs, even when they are charred.

Step 2 – Steaming roasted peppers
Steaming the peppers after roasting makes the skins easier to peel.
Steaming in a brown paper bag
When I first began roasting peppers I read that you should put them in a paper bag to steam. I’ve never been a fan of that idea because it doesn’t seem hygienic to me – plus it isn’t feasible when processing a lot of peppers. The FDA has warned that “ink, glue, and recycled materials in brown paper bags may emit toxic fumes when the bag is heated”. In addition, peppers release juices after they are roasted. My preferred methods below catch these flavorful juices instead of them being soaked into a bag.
Better methods for steaming
Instead I use the “plate method” when roasting just a handful of peppers or the “casserole method” when roasting a larger quantity.
Plate Method
Put the peppers on a large plate and cover with a second large plate (that’s flipped over). They’ll happily steam this way.
Casserole Method
Put peppers in a covered casserole dish or covered pot to steam.
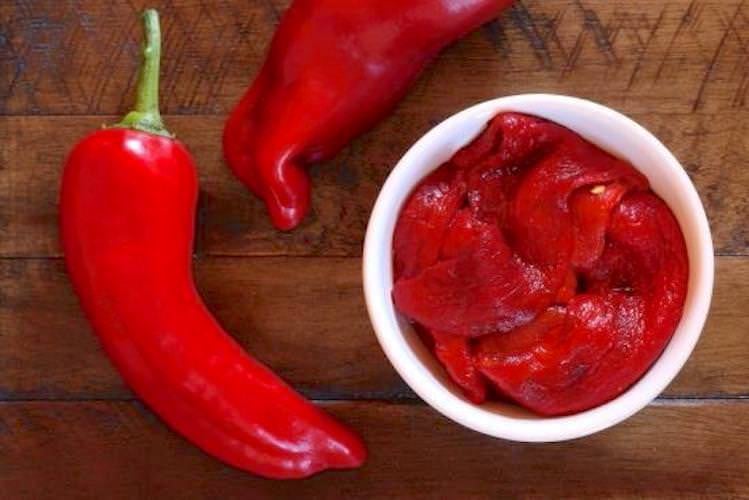
Step 3 – Peeling and removing stems/seeds
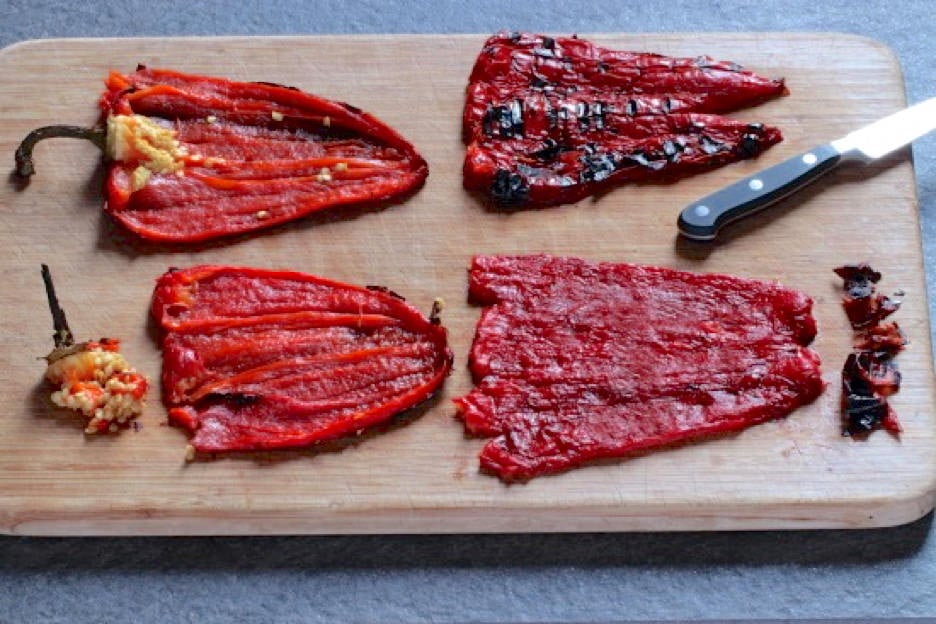
Put a roasted pepper onto a large cutting board. Slice through the pepper’s top layer lengthwise from stem to tip. Hold the stem, and using a paring knife release the pepper from the stem. The pepper should now be open and laying flat. Remove the seed ball and any stray seeds (this entire process is shown in my video below).
Turn the pepper over and scrape the skin off with paring knife using a sweeping motion. Some people peel the skin off with their fingers, but I find that method to be messy and more time consuming.
I don’t suggest running the pepper under running water during this process because it will wash away flavor and juices.
Step 4 – Freezing (optional)
Roasted peppers only keep for about one week in the refrigerator; however, they freeze well.
Freezing in glass jars
- Place peppers in clean, pint-sized mason jars
- Look for the words “fill line” etched near the top of the mason jars. Don’t fill beyond that line. The jars may crack if they are overfilled when the product heaves and expands.
- As an optional step, lay a piece of parchment paper on top of the peppers to prevent freezer burn.
- Cap the jars, label, and place in your freezer. For best results the temperature should be 0ºF or lower. The rear and lower shelves of the freezer tend to be the coldest locations.
Freezing in bags
You may prefer to freeze the peppers in bags so you can stack them in flat packages. A vacuum sealer such as a FoodSaver helps to remove the air from the packages so the quality is preserved. The FoodSaver bags are BPA-free.
They can also be frozen in zip top style freezer bags; however, the peppers may develop freezer burn if air leaks back into the bags. Use your hands to try and squeeze as much air from the bag as possible before locking. Then open just enough of the seal to slide a straw into the bag. Suck out any remaining air through the straw and seal well. Consider using a freezer bag with a double seal; some are BPA-free.
Ways to enjoy roasted peppers
Now you know how to grill peppers 🙂 so how do you eat them? We eat roasted peppers as a side-dish right out of the jar. We also include roasted peppers in our holiday antipastos – but there are so many other ways to enjoy them such as:
- chopped and added to hummus, or blended into hummus
- as a pizza topping
- baked into casseroles
- draped over baked potatoes
- added to wraps
- made into roasted red pepper soup
- chopped and used as a garnish
- blended into cashew cheese
- drizzled with olive oil and/or balsamic vinegar, then sprinkled with salt and herbs
- served on crackers
- added to salads
- included in pasta and stir fry recipes
- and more!

If you enjoyed this post you may also enjoy How to Make Paprika.
Looking forward to trying this method on my Carmen peppers soon. Thanks
Let us know how they come out!
So, I am looking to grill pepper halves on our outside grill and them freeze via vacuum seal bags. This will work, yes?
Hi Julie. I’ve only grilled whole peppers like in my video. I’ve never seen anybody halve them first.
I like to slow roast them with sweet onions using my ovens “air fryer” with herbs and smoky olive oil.
Then divide up and freeze in baggys to use for everything. So yummy!!